Easy Jiffy Corn Casserole Recipe
Introduction
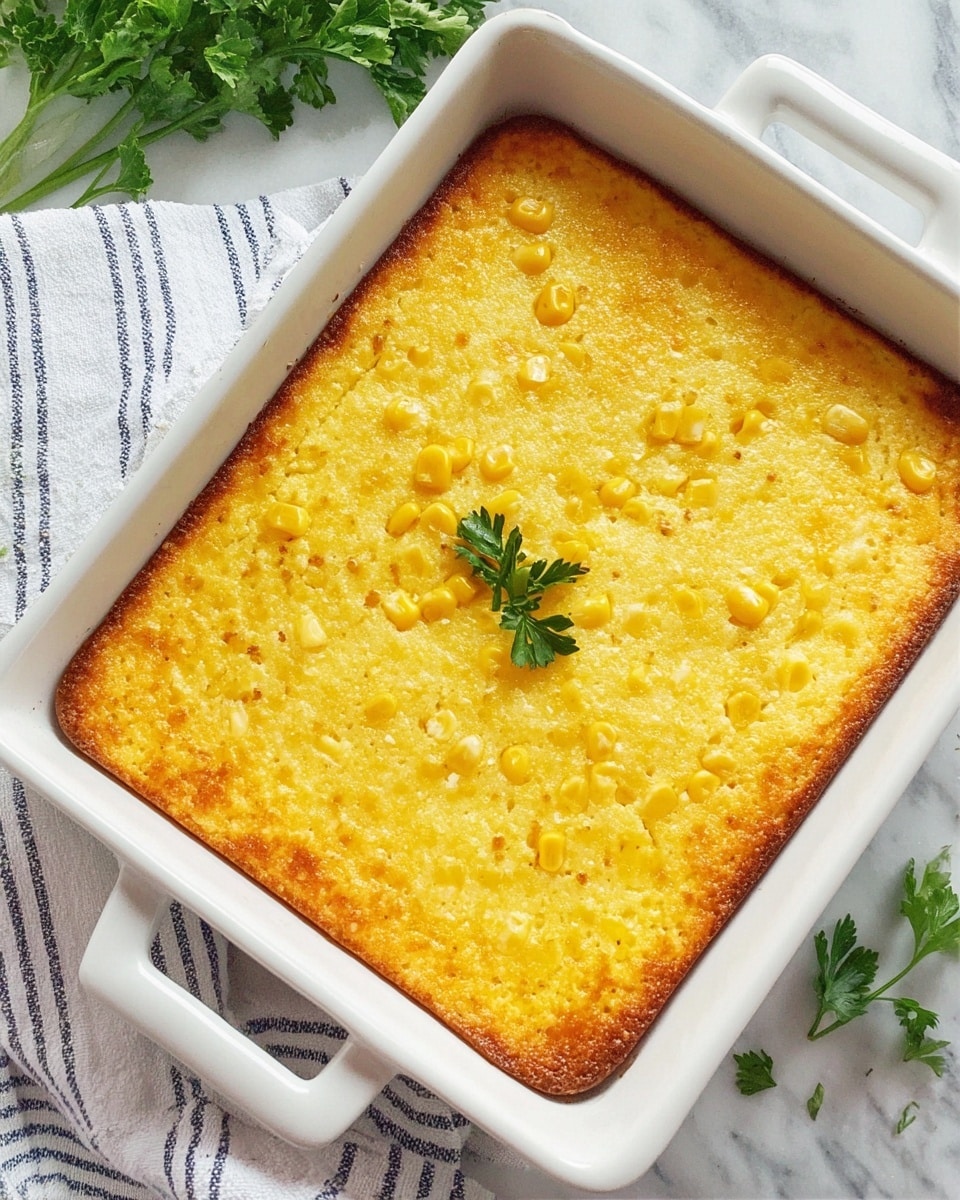
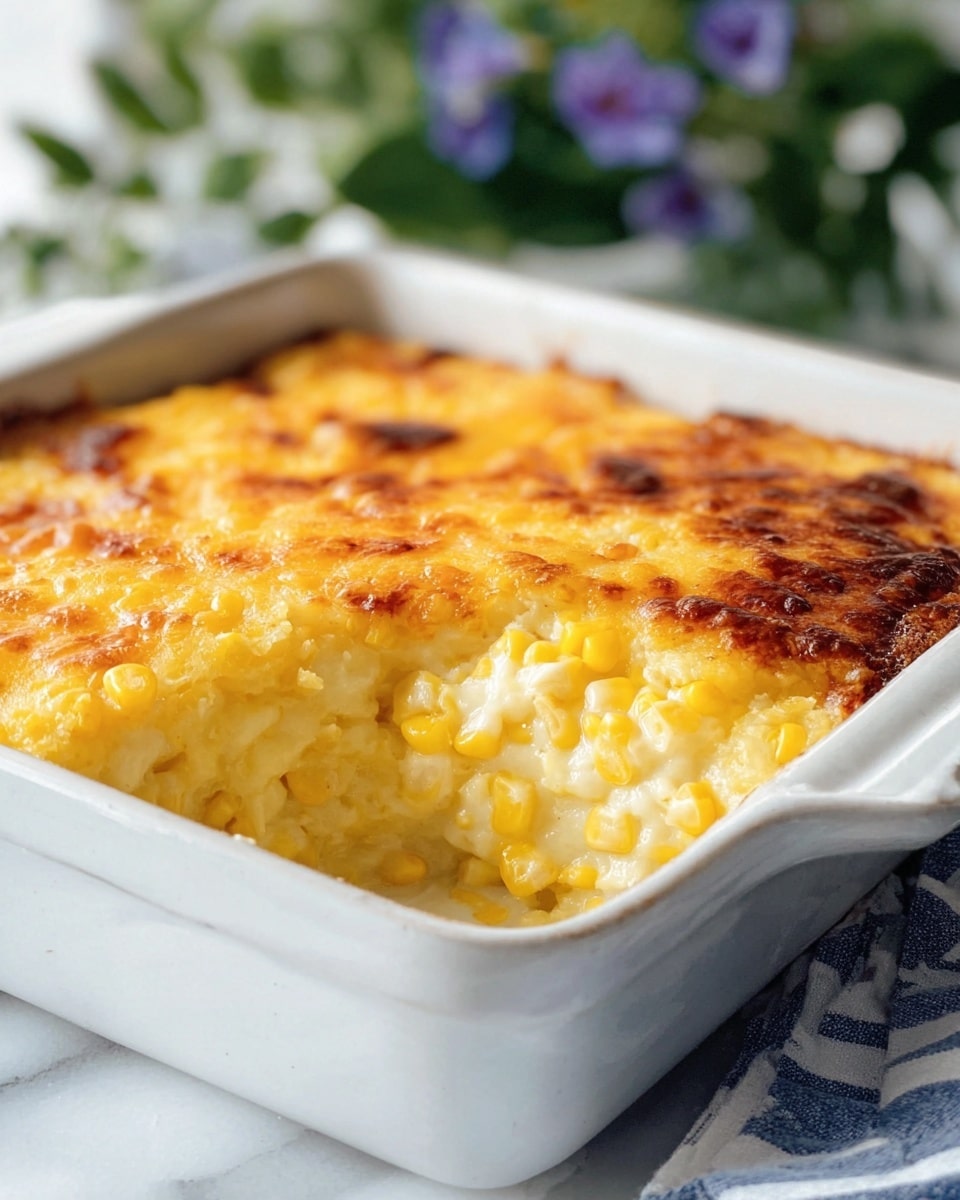
This easy Jiffy Corn Casserole is a comforting, creamy side dish that comes together quickly with simple ingredients. It’s perfect for family dinners or holiday gatherings, offering a sweet and savory flavor with a moist, tender texture.
Ingredients
- 1 box corn muffin mix (8.5 oz. Jiffy)
- 1/2 cup butter, melted
- 1 cup sour cream (8 oz.)
- 1 can regular corn kernels, drained (15.25 oz.)
- 1 can creamed corn (15.25 oz.)
- 2 large eggs
Instructions
- Step 1: Preheat your oven to 350 degrees F. While the oven is warming, gather all ingredients and drain the whole kernel corn thoroughly.
- Step 2: In a large bowl, lightly beat the eggs with a fork. Add the melted butter and sour cream, then stir in both cans of corn. Whisk everything together until well combined.
- Step 3: Pour the Jiffy Corn Muffin mix into the wet ingredients. Stir until the mixture is smooth and free of lumps.
- Step 4: Butter an 8×8 inch casserole dish to prevent sticking. Pour the mixture into the dish and spread it evenly.
- Step 5: Bake uncovered for 45 minutes. The casserole is done when the top is golden, edges are slightly cracked, and the center is firm but not jiggly.
- Step 6: Remove from the oven and let it cool slightly before serving warm.
Tips & Variations
- For extra flavor, add a cup of shredded cheddar cheese to the mixture before baking.
- If you prefer a spicier casserole, mix in some diced green chilies or a pinch of cayenne pepper.
- Use a non-stick spray instead of butter to prepare the casserole dish for quicker cleanup.
- Try substituting Greek yogurt for sour cream for a tangier taste and extra protein.
Storage
Store leftover casserole in an airtight container in the refrigerator for up to 3 days. To reheat, warm individual portions in the microwave for about 1-2 minutes until heated through, or bake at 350 degrees F for 15 minutes until warmed.
How to Serve
Serve this delicious recipe with your favorite sides.
FAQs
Can I make this casserole ahead of time?
Yes, you can prepare the casserole mixture and refrigerate it for a few hours before baking. Just increase the baking time slightly if baking straight from the fridge.
Can I freeze leftovers?
Yes, this casserole freezes well. Wrap cooled portions tightly in plastic wrap and foil, then freeze for up to 2 months. Thaw overnight in the fridge before reheating.
PrintEasy Jiffy Corn Casserole Recipe

Easy Jiffy Corn Casserole is a simple, comforting side dish combining sweet corn flavors with a moist, golden-baked corn muffin base. Perfect for potlucks, holiday dinners, or weeknight meals, this casserole blends creamed corn, whole kernel corn, and a classic Jiffy corn muffin mix into a creamy, tender bake that everyone will love.
- Prep Time: 10 minutes
- Cook Time: 45 minutes
- Total Time: 55 minutes
- Yield: 6 servings 1x
- Category: Side Dish
- Method: Baking
- Cuisine: American
Ingredients
Wet Ingredients
- 2 large eggs
- 1/2 cup butter, melted
- 1 cup sour cream (8 oz.)
Corn Ingredients
- 1 can regular corn kernels, drained (15.25 oz.)
- 1 can creamed corn (15.25 oz.)
Dry Ingredients
- 1 box corn muffin mix (8.5 oz. Jiffy)
Instructions
- Preheat the Oven and Prepare Ingredients: Preheat your oven to 350 degrees F. Gather all ingredients and drain the whole kernel corn thoroughly to avoid excess moisture in the casserole.
- Mix Wet Ingredients: In a large bowl, lightly beat the eggs with a fork. Add melted butter and sour cream, then stir in both cans of corn (drained whole kernel corn and creamed corn). Whisk the mixture until fully combined.
- Incorporate the Corn Muffin Mix: Add the entire box of Jiffy corn muffin mix to the wet ingredients. Stir thoroughly until the batter is smooth and free of lumps, ensuring even distribution of all ingredients.
- Prepare the Casserole Dish: Butter an 8×8 inch casserole dish well to prevent sticking. Pour the mixture evenly into the dish, spreading it out for uniform baking.
- Bake the Casserole: Place the casserole dish in the preheated oven and bake uncovered for 45 minutes. The casserole is done when the top is golden, edges show slight cracks, and the center feels firm but not dry.
- Cool and Serve: Remove the casserole from oven and let it cool for a few minutes. Serve warm as a delicious side to your meal.
Notes
- Ensure the whole kernel corn is well drained to prevent a soggy casserole.
- Use an 8×8 inch casserole dish for perfect thickness and baking.
- For extra moisture, you can add a splash of milk if the batter seems too thick.
- This casserole pairs well with grilled meats and holiday roasts.
- Leftovers can be refrigerated and reheated gently in the oven or microwave.
Keywords: corn casserole,jiffy corn casserole,easy corn side dish,baked corn casserole,holiday side dish